






Cleaning an AR-15 mostly means getting carbon off the bolt carrier group (BCG) and out of the chamber, then putting light lubrication back on the parts that slide. The barrel matters too, but the BCG is where AR-15s get dirty fastest, because the direct impingement gas system sends hot gas right into it.
Clear the rifle first
Safety first, every time: remove the magazine, lock the action open, and check the chamber twice, once by looking and once with a finger. Take all ammunition out of the room before you start. Work in a ventilated area, wear safety glasses because springs and solvent can fly, and wash your hands afterward since fired-gun residue contains lead.
On an AR-15: put the selector on SAFE, drop the magazine, pull the charging handle back and lock the bolt open, then look into the chamber and feel it with a finger.
Tools for cleaning an AR-15
- Cleaning rod or bore snake for .223/5.56 (or your caliber), and a rod guide
- Bronze bore brush, jag and patches
- AR chamber brush (cleans the chamber and the locking lug recesses)
- Carbon scraper, nylon brush, cotton swabs, pipe cleaners
- Solvent or CLP, and gun oil or light grease
Step 1: Separate the upper and lower
- Push the rear takedown pin from left to right until it stops. It stays captive in the receiver.
- Pivot the upper receiver forward off the lower.
- Push out the front pivot pin and lift the upper away.
Step 2: Remove the BCG and charging handle
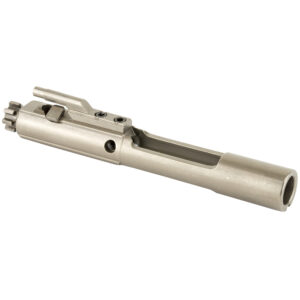
Pull the charging handle partway back and slide the bolt carrier group out the rear of the upper. Then pull the charging handle down out of its track and remove it.
Step 3: Field strip the bolt carrier group
- Push the bolt into its rearward (locked) position inside the carrier.
- Pull the firing pin retaining pin out from the left side of the carrier.
- Tip the carrier up and let the firing pin slide out the back.
- Rotate the cam pin a quarter turn and lift it out.
- Pull the bolt out the front of the carrier.
Stop there. For routine cleaning you don’t need to remove the extractor, the gas rings or the gas key. The gas key screws are staked in place at the factory and should not be loosened.
Step 4: Clean the bolt, carrier and firing pin
- Bolt tail: carbon cakes on the rear of the bolt. Soak it with solvent and scrape it off.
- Bolt face and extractor: scrub with a nylon brush and use a pick or swab under the extractor claw.
- Locking lugs: brush them clean.
- Inside the carrier: the bore where the bolt rides collects heavy carbon. Use a swab, brush or scraper.
- Gas key: run a pipe cleaner through it.
- Firing pin and cam pin: wipe clean and check for burrs or damage.
Step 5: Clean the chamber and bore
Insert a rod guide into the back of the upper receiver so the rod stays centered, then clean the bore from the chamber end toward the muzzle: wet patch, soak, bronze brush, dry patches until clean. Use a chamber brush on a short rod to scrub the chamber and the star-shaped locking lug recesses in the barrel extension. Cotton swabs help clean between the lugs. Wipe out the inside of the upper receiver, especially the area around the bolt and the ejection port. Our how to clean a gun barrel guide covers bore cleaning in detail.
Step 6: Clean the lower receiver
The lower usually needs only a wipe and a brush to clear carbon and brass shavings from around the hammer and trigger. Don’t remove the trigger group for routine cleaning, and keep solvent from pooling in it.
Step 7: Lubricate the AR-15
AR-15s run best with a little more lube than most handguns, but it shouldn’t be dripping. Put a light coat of oil on:
- The bolt body and gas rings
- The cam pin and its slot
- The locking lugs
- The shiny wear surfaces (rails) on the outside of the carrier
- The sides and top of the charging handle
A drop on the takedown pin detents and on the selector if it’s stiff is fine. Wipe off excess, since oil that gums up with carbon causes more problems than it solves. More on lube points in where to oil a gun.
Step 8: Reassemble and function check
- Put the bolt back in the carrier, insert the cam pin and turn it a quarter turn, drop the firing pin in from the rear, and push in the firing pin retaining pin.
- Check that the firing pin doesn’t fall out when you tip the carrier nose down.
- Make sure the cam pin is installed. Leaving it out is a known and dangerous reassembly mistake.
- Install the charging handle, then the BCG with the bolt extended forward, and close the upper onto the lower.
- Function check with the rifle unloaded: on SAFE the trigger shouldn’t release the hammer; on FIRE it should; the trigger should reset when you cycle the charging handle.
AR-15 cleaning mistakes to avoid
- Cleaning from the muzzle without a guide, which can wear the crown.
- Removing the gas key or taking the trigger group apart during routine cleaning.
- Mixing bolts and carriers between rifles. Keep each BCG with its own rifle unless a gunsmith has checked headspace.
- Skipping the chamber and lug recesses, where carbon causes extraction trouble.
If your AR has feeding or extraction problems after a good cleaning, or you’re building or upgrading one, our gunsmith handles AR work from upper assembly ($55 labor) to a complete build ($80 labor), plus tax. See services.
Common Questions
How often should I clean my AR-15?
Clean the bolt carrier group and chamber after each range session, and do a full bore cleaning regularly. More rounds, suppressor use or dirty ammo means more frequent cleaning.
Do I need to take the bolt out of the carrier?
Yes, for a proper cleaning. Carbon builds up on the bolt tail and inside the carrier, and you can only reach it with the bolt removed.
Should an AR-15 be run wet or dry?
An AR-15 generally likes a light coat of lube on the bolt carrier group and charging handle. It should look wet, not dripping, and excess should be wiped off.
Can I remove the gas key to clean it?
No. The gas key screws are staked at the factory, and removing them isn't part of routine cleaning. A pipe cleaner through the gas key is enough.